Guides Tunji Oyeniran
A checklist for moving your election online
Nine things to settle before your association, school, or union votes online for the first time.

Most first online elections go wrong before voting opens. The voter list has duplicates. Nobody agreed who may see the result. Half the members did not know which email to expect.
None of these is a software problem. This checklist covers what to settle first, in the order you will need it.
1. Read your rules before you open the dashboard
Your constitution or by-laws answer most setup questions. Find these answers and write them down.
- Who may vote, and on which positions?
- How many candidates may a voter pick for each position?
- May a voter skip a position?
- Who declares the result, and who may watch the count?
If your rules do not answer these questions, get your election committee to decide them now. Do not decide them on election day.
2. Clean the voter list
The voter list is the election. Give each voter one row with a name, an email address, and an ID your members already know, such as a matric number, staff number, or membership number.
Then check three things.
- Each email address appears once.
- Each ID appears once.
- Each person on the list is eligible today, not last year.
You can import the list from a CSV file. If you do not have a list, open public registration and approve each person who registers.
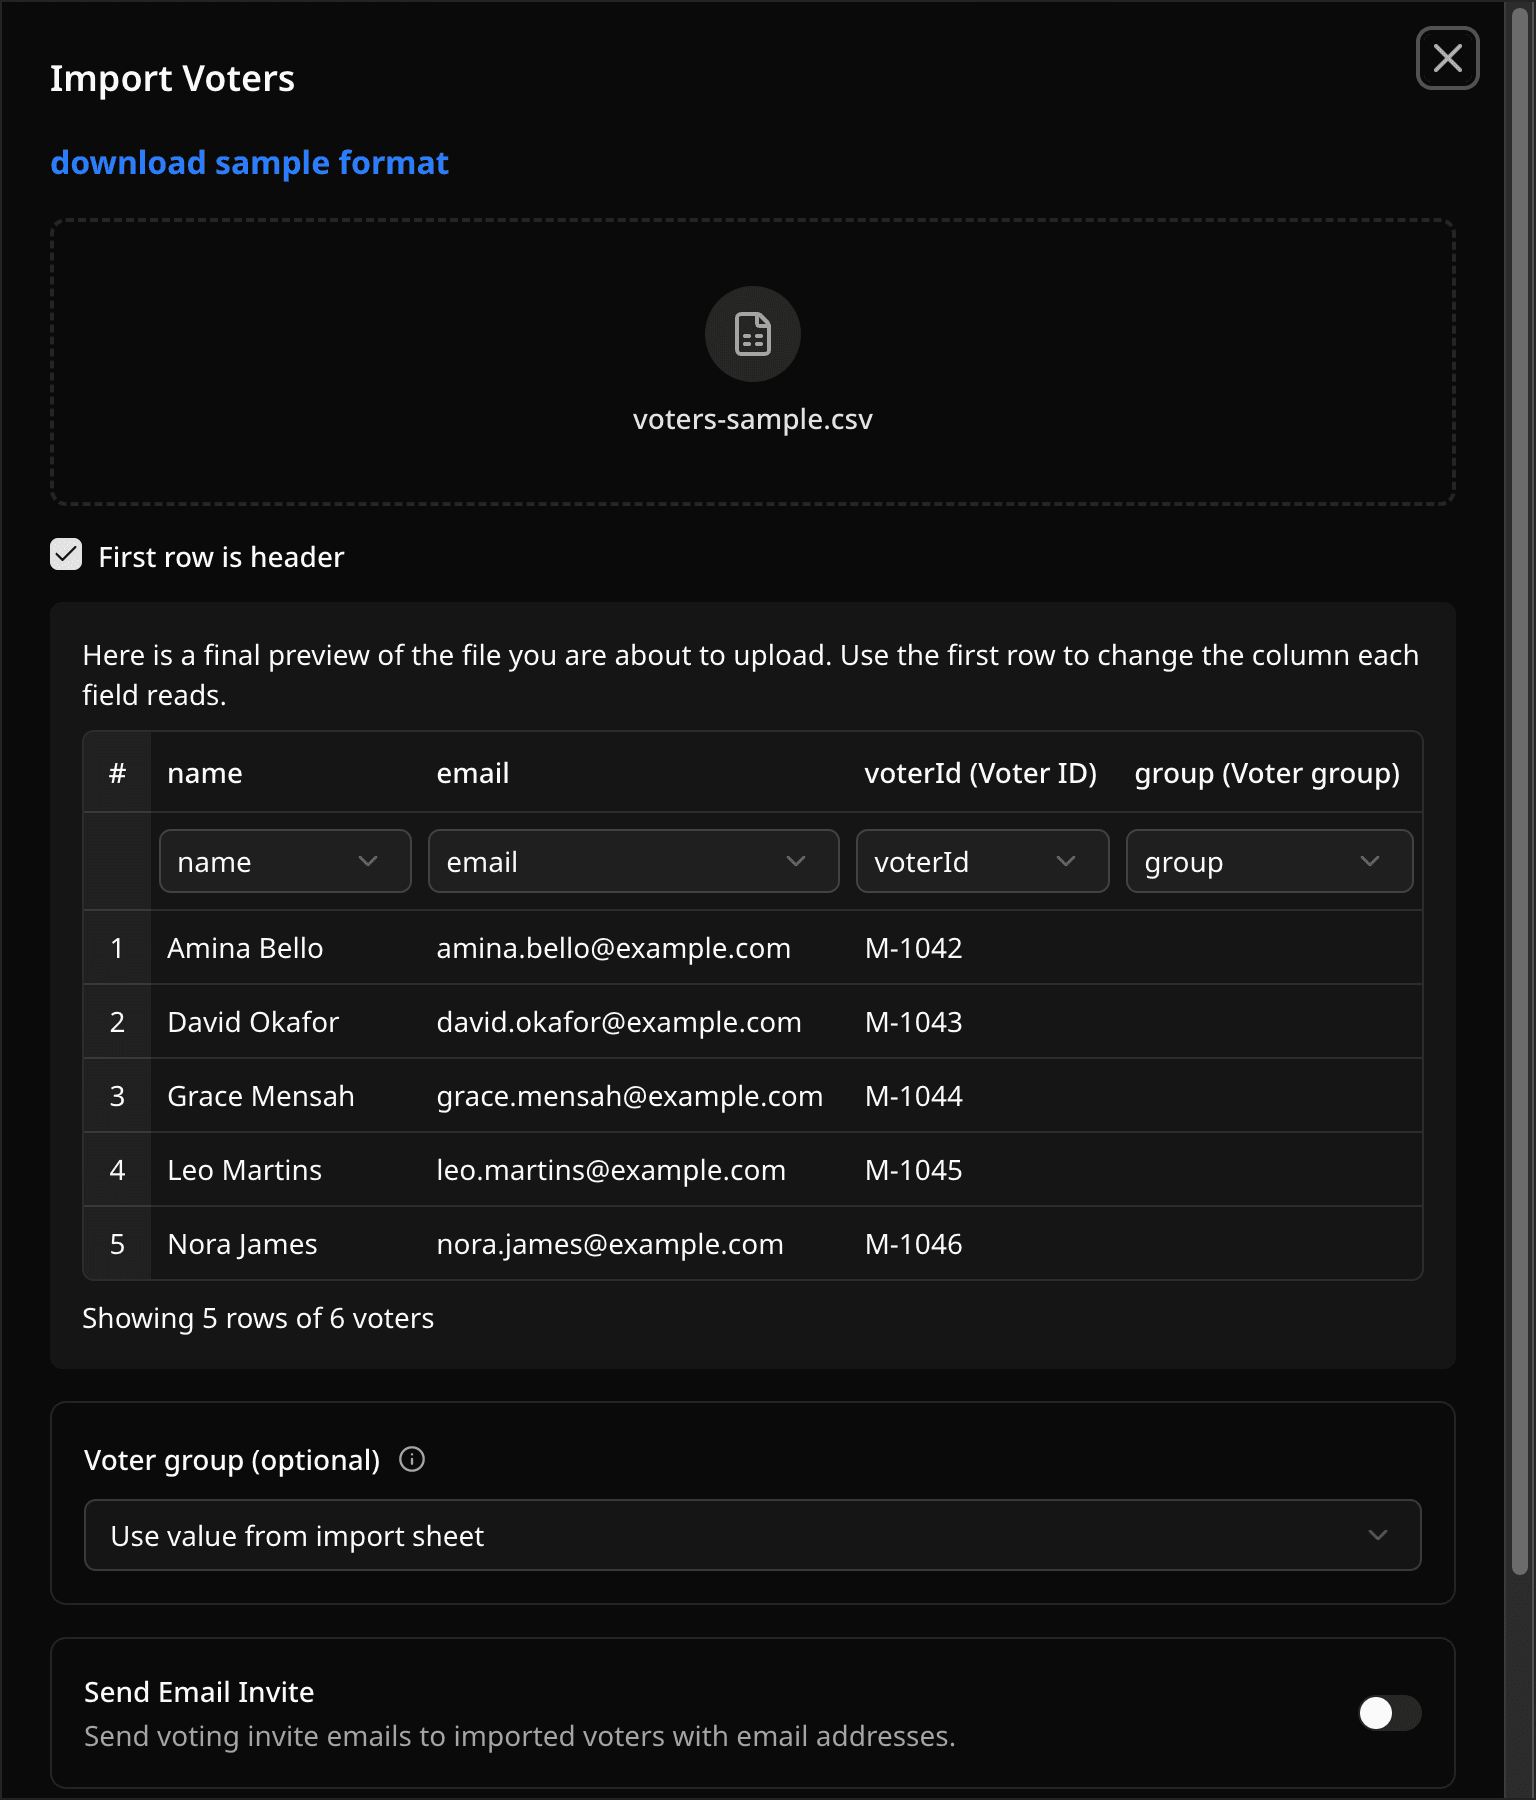 The import shows a preview of your file before it adds anyone.
3. Choose how voters prove who they are
In a Pepvote election, each voter has a voter key. The voter enters it to open the ballot to start voting, and it works once. You can also ask for the voter ID from your list as a second check.
Before voting day, tell voters that their voter key will arrive at the email address they registered with. When voting opens, Pepvote emails each voter on the list a link straight to the ballot. The voter opens the link, asks for a key, and the key arrives at that same email.
4. Build the ballot and read it on a phone
Add your positions and candidates, with a photo for each candidate if you have one. Set how many choices each position allows.
Then open the ballot preview on a phone. Most of your members will vote on one. If the ballot is long, turn on the step-by-step layout, so that voters see one position at a time.
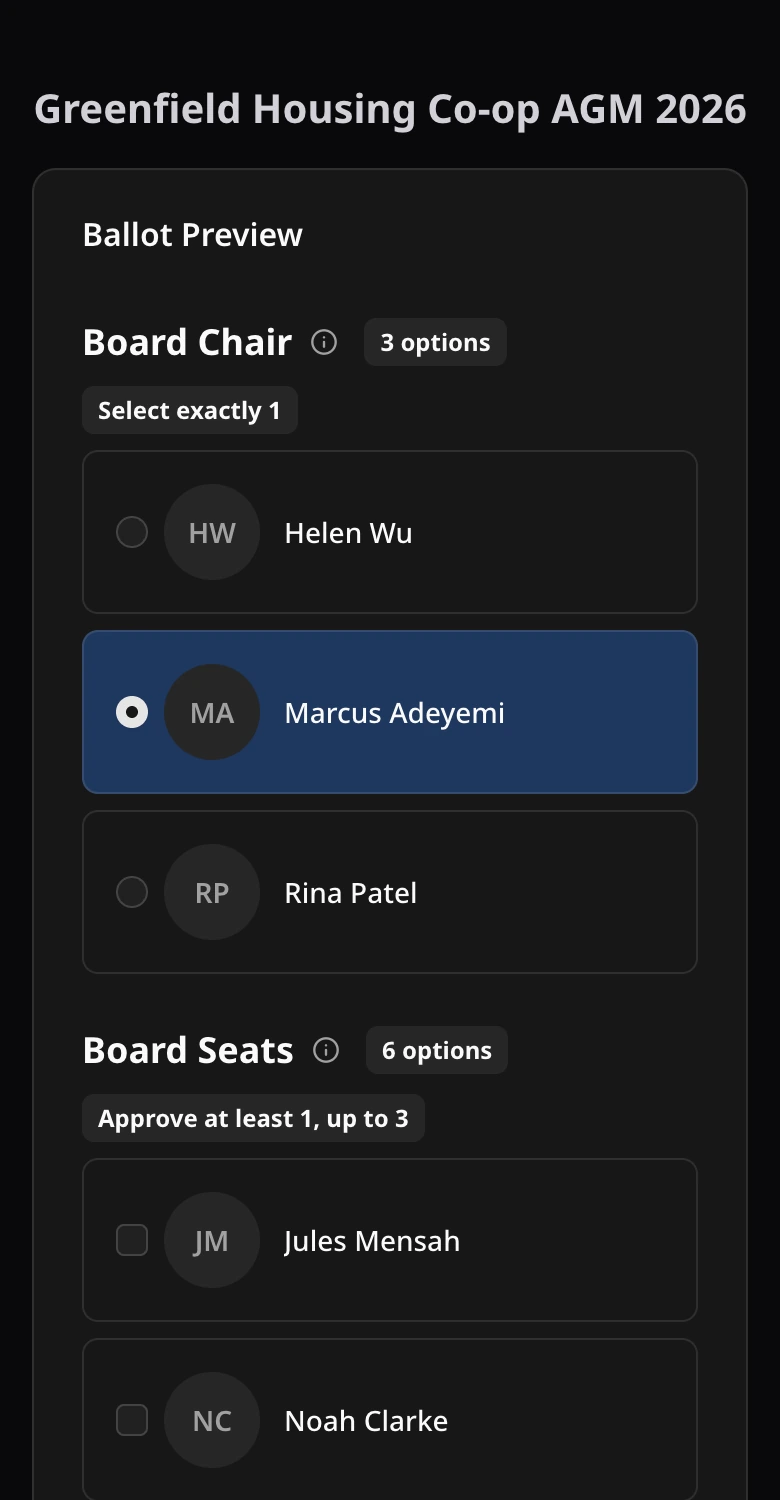 A ballot at phone width. Check that names and positions read well here first.
5. Decide who sees the result, and when
There are two honest choices.
- Show the result while voting is open. Everyone watches the same count. This suits awards and open polls.
- Publish the result after voting ends. Nobody is influenced by the running count. This suits most elections.
Choose one and tell your members before the vote. A rule that is announced in advance is hard to argue with afterward.
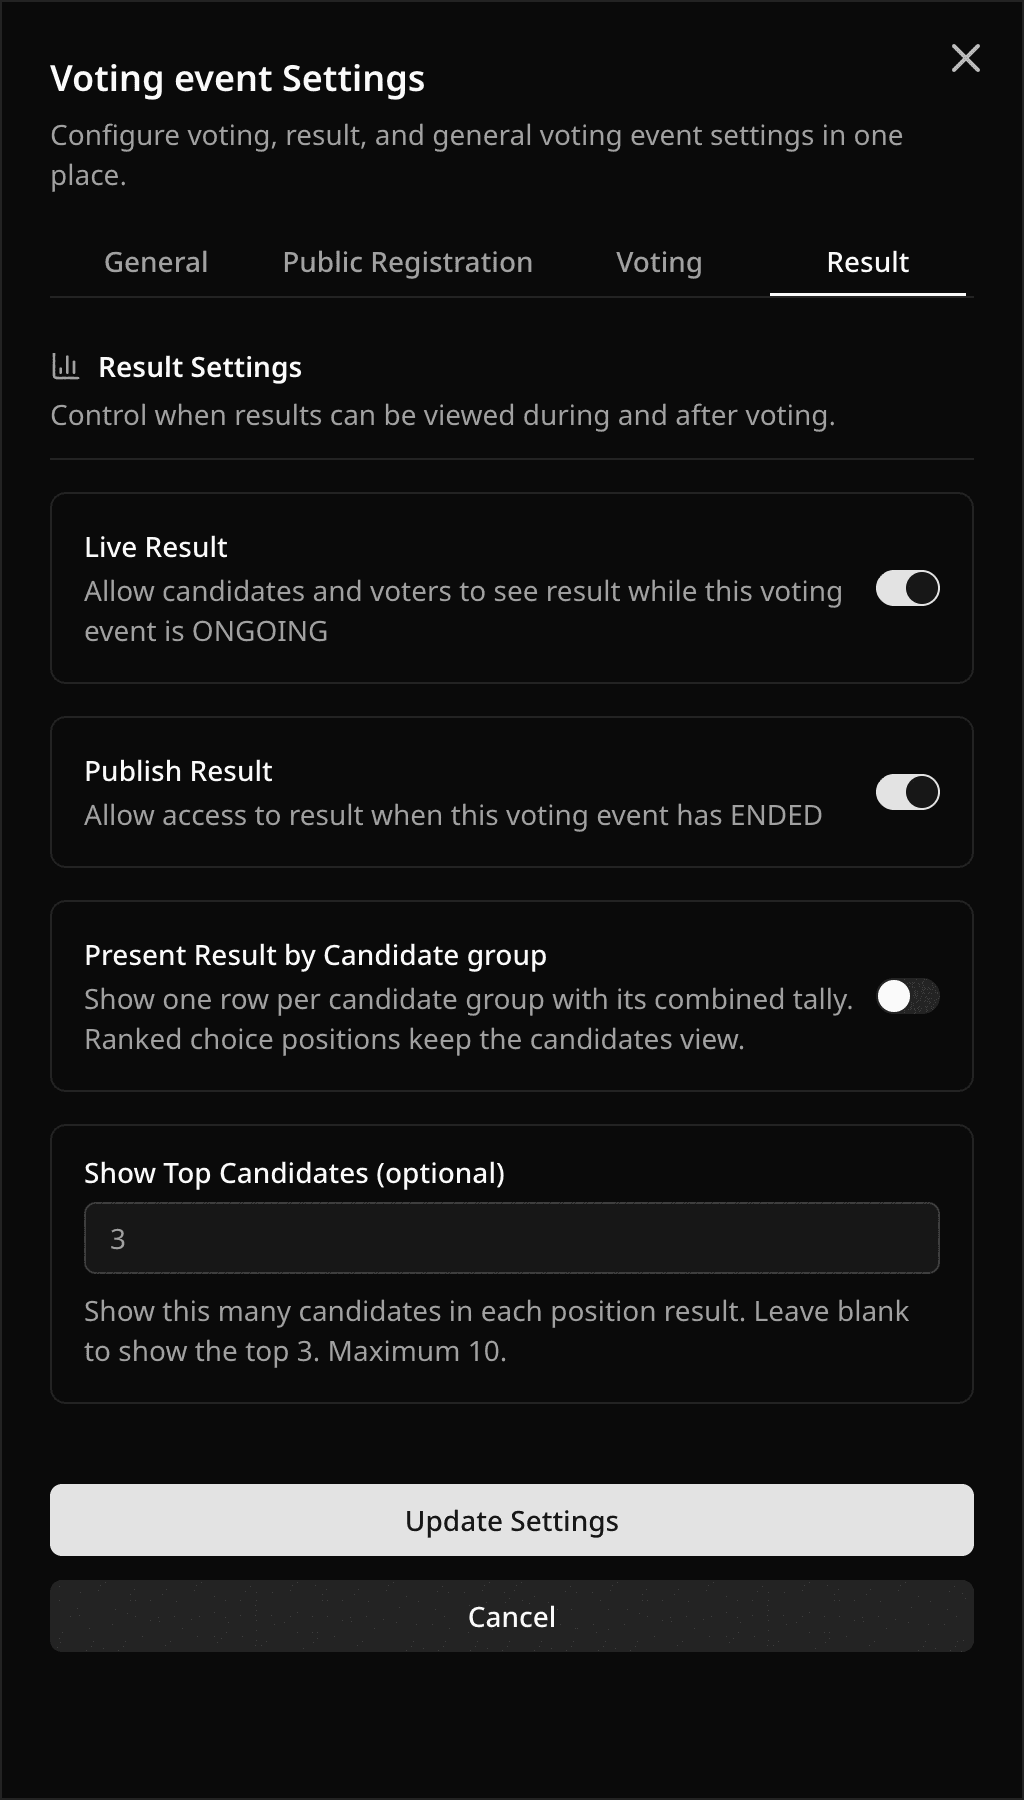 The two switches that decide who sees the result: Live Result and Publish Result.
6. Give the right people access
Do not share one login. Invite your committee members and observers as officials on the voting event, so that each person signs in as themselves.
7. Check for unequal votes
Some bodies do not give every member one vote. A delegate may vote for a whole branch, or shares may decide the weight. If your rules say so, turn on weighted voting and set each voter's weight before voting starts.
If every member has one vote, leave it off.
8. Tell voters what will happen
Send one message a few days before the vote. Include these points.
- The date and time voting opens, and when it closes.
- How they will get their voter key. If it comes by email, name the sender.
- That each voter gets a confirmation code after they vote, and can use it to check their ballot.
- Who to contact for help.
9. Do a dry run
Use the interactive demo to see what a voter sees. Even better, you can rehearse with your team on your real event with Test Mode. Add three colleagues as test voters, open the ballot, cast their votes, and check the result.
In Test Mode, every email is marked [TEST], and you can send them all to one test address. No payment is charged. When the rehearsal is done, clear the test data and turn Test Mode off. Your real voters and candidates stay, and the event starts clean.
On voting day, the checklist on your voting event shows what is still left to do before you can start.
After the vote
Publish the result and keep a copy with the minutes. Next year, you can import the positions and voters from this event and start from step 2. The pricing page shows which plan includes import from previous events and exports.
When you are ready, create your first voting event. The Support Center has a guide for each step above.